Capturing the Ocean’s Spell… in an Altoids Tin

When I’m on the beach, anything feels possible. There’s something about all that vast expanse of open space and air, the  bright light and the shifting shades of blue that seems to open the heart and the mind to life. We humans are drawn to the ocean and we seek to represent its beauty and rekindle the feelings of wonder and expansiveness it evokes in our art and decor. This is part of the appeal of shells and shellwork — they’re lovely little objects on their own, and they can’t help but remind us of the ocean’s magic.
Idea Debt

Idea Debt

Every time I pick up a pretty bit from the beach, I have a project in mind. And here’s where I run into a problem — I have a lot of shells which means I have a lot of undone projects drifting around in my head. Have you ever heard of “idea debt”? I first came across the concept in the book Growing Gills by Jessica Abel. Jesica explains how having a whole bunch of ideas “swimming around in the brain” can cause an undercurrent of anxiety because at all times, some part of the brain has to be devoted to processing them.

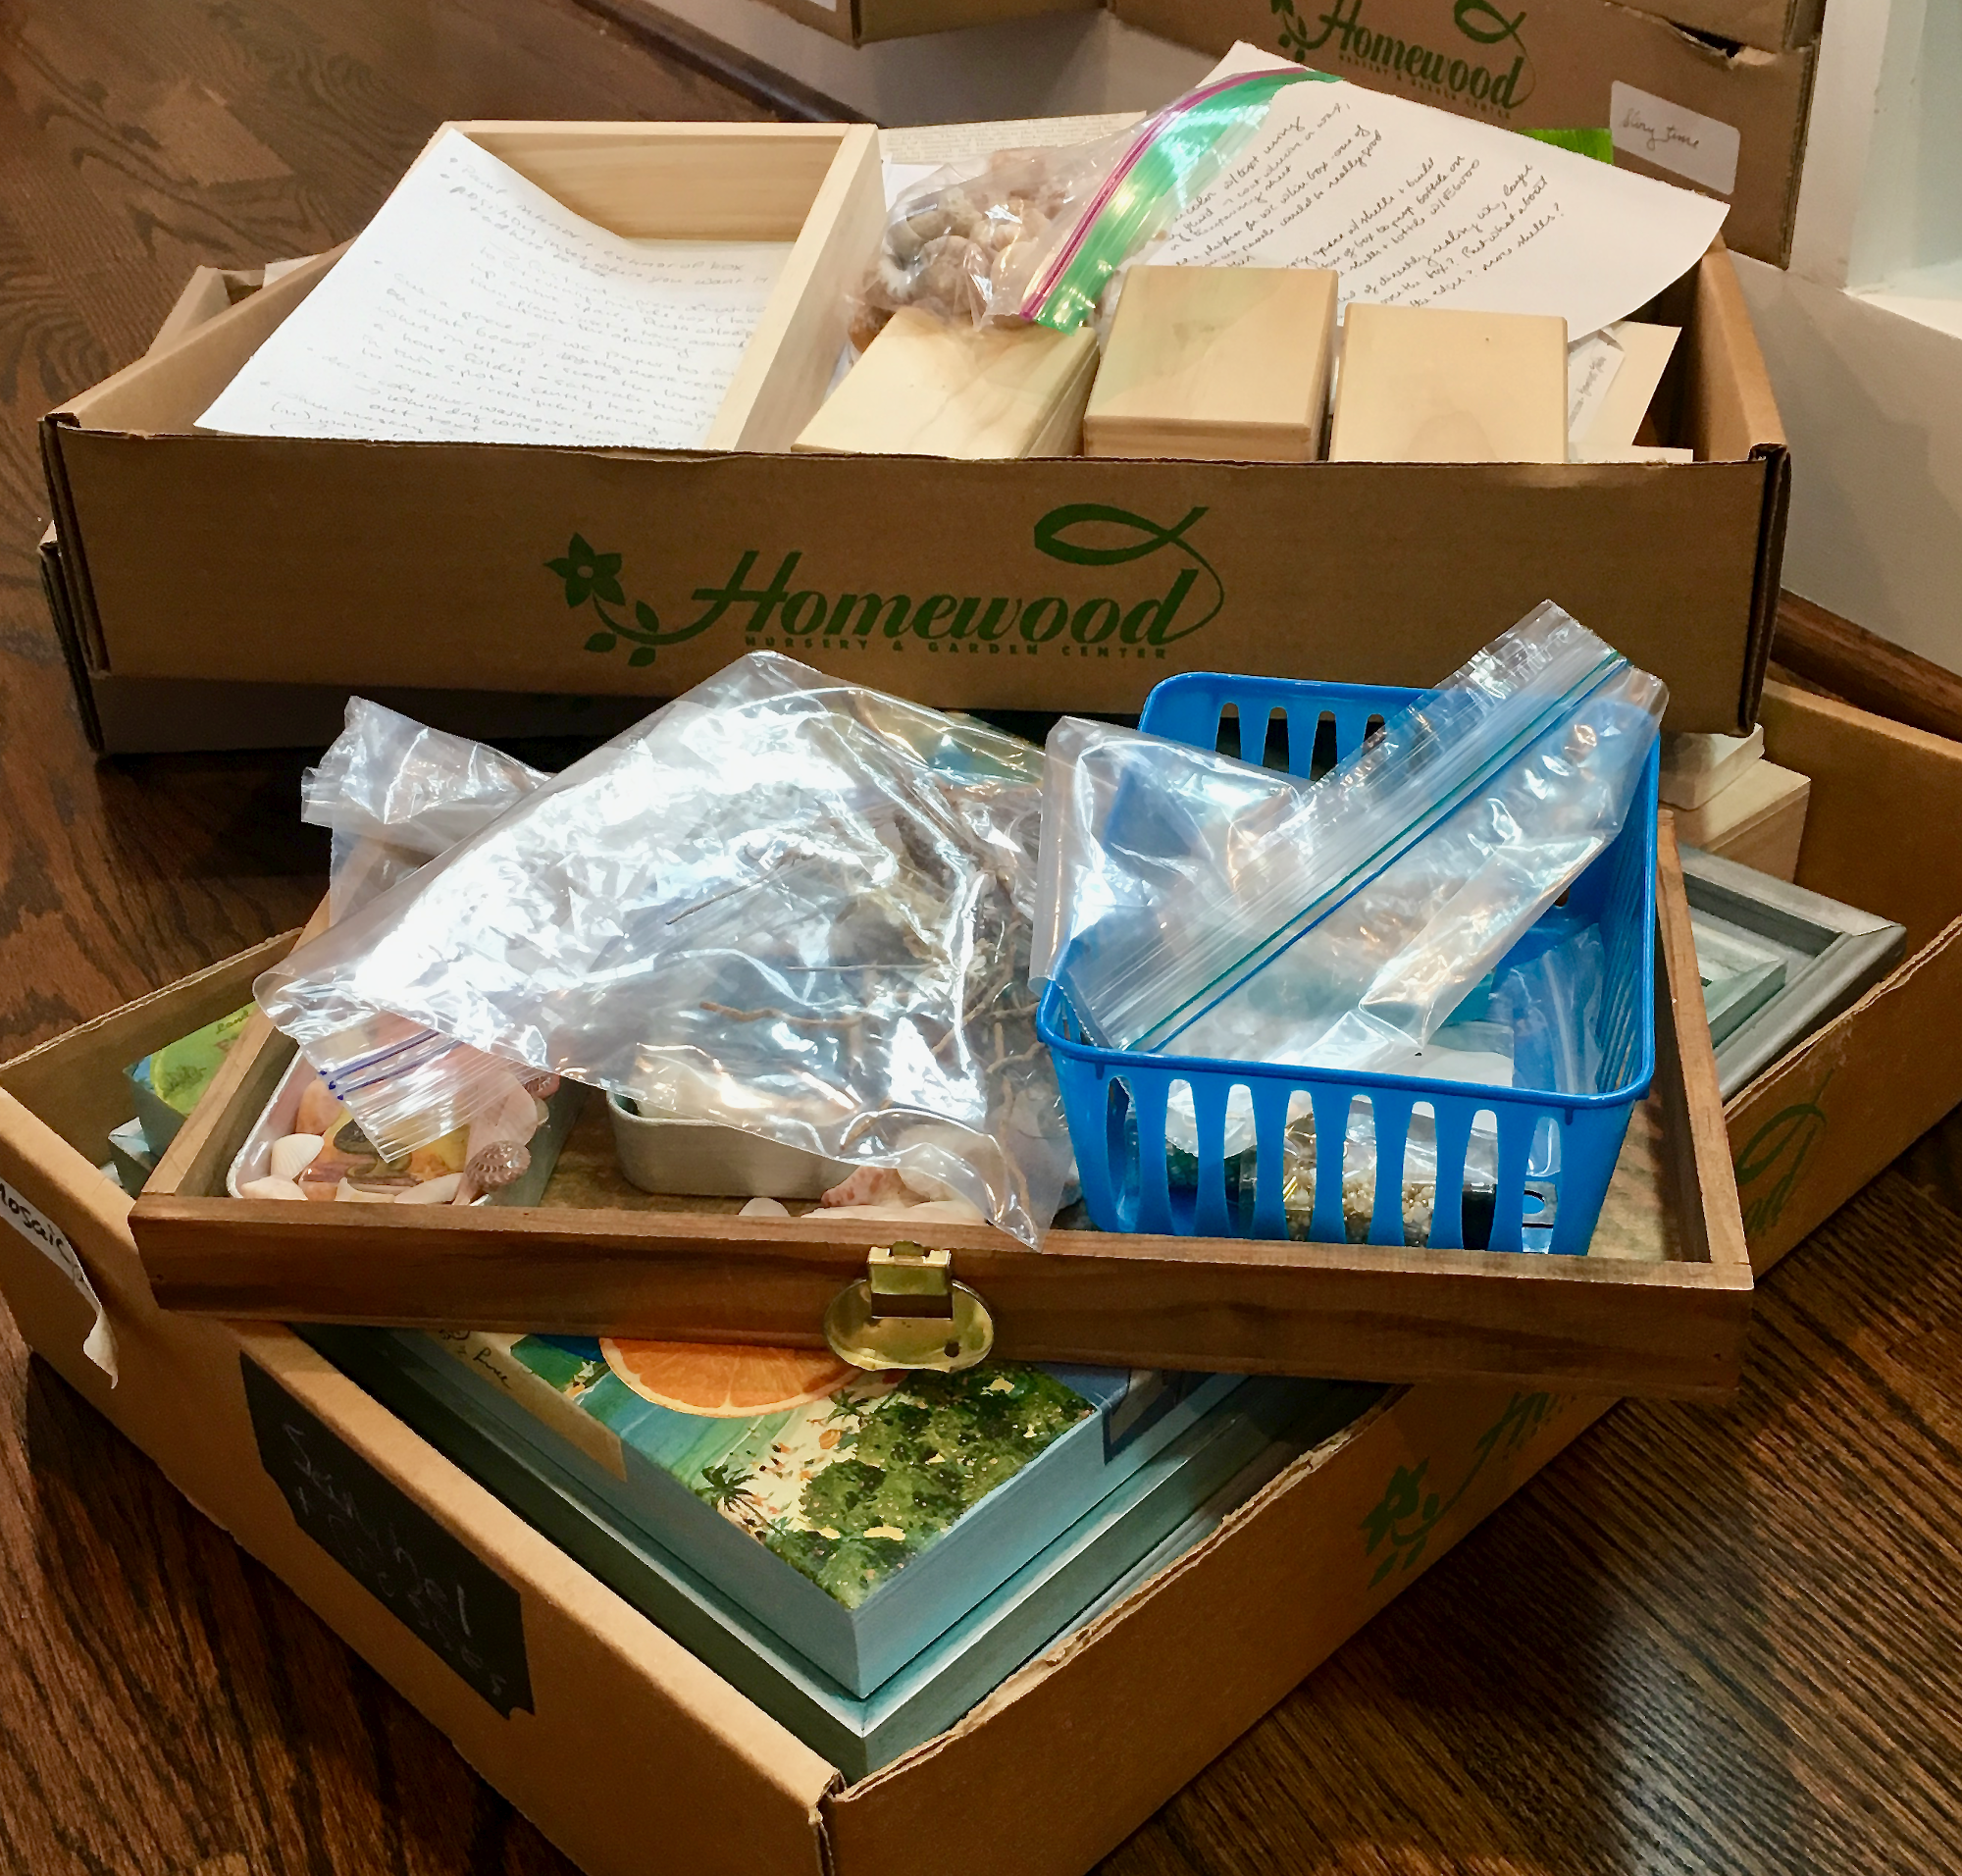
I have shelves full of idea debt. For the past decade (?) inspiration has haunted me and I’ve been gathering up the things she points out on the beach, at antique malls, from paper stores, etc. and stuffing them in cardboard garden-center plant trays. As I said in the January newsletter, my mission in 2020 is to work through, theme by theme, some of the deepest piles of idea debt. Which brings us back to the “Sanibel Collection”. These are the projects I’m currently working on, the plan is to have them done sometime in February.

BP7- Projects3.jpg

I’m not even sure when I started these small assemblages made from Altoids tins. The “Neptune’s Castle” picture was part of an advent calendar, and the tiny vintage postcard print? I’m not really sure where I got that. I was intrigued by jewelry made with an image encased in resin and I had the idea to set the resin-covered images among shellwork. At one point I think I was calling them “Mermaid Windows”, but I don’t think I’ll stick with that title. They’re meant to go under a glass cloche, or they could stand on their own. I came so close to completing them! I’m not sure why I shelved them, but the only things left to do are to finish the shell frames around the mouths of the tin and mount them on a shell and rock base. It may be that last step that side-tracked me, not sure exactly how that’s going to happen.

Finishing the shell frames will be easy; here’s a tip on gluing shells to a base:

 
I think I need a new glue gun.

I think I need a new glue gun.

 
Prepped substrates and a “practice” watercolor

Prepped substrates and a “practice” watercolor


Next up: lettering, watercolor and shells. There are so many fantastic sayings about the sea. Even a single word — I once did a lovely little shadowbox that featured the word “Persevere”, can be evocative when placed among shells. (No picture of that piece, unfortunately.) There are two, possibly three, quotes that I want to place on a watercolor background set among shells. I have the bases ready and painted, from a while ago. At the time I painted the substrates, I also tried a watercolor with lettering (in photo to right) but was not happy with the results. The project went back on the shelf. This time I’m going to try a slightly different format for the quotes but still surround them with shells.


Here are two techniques for filling in a large area with shells:

 
I used Artisan Enhancements Pearl Plaster

I used Artisan Enhancements Pearl Plaster

 
BP 7- Projects2.jpg

I’m also working on some beach-themed art cards. I’m (going to be) painting small, almost abstract watercolors of the water. The paintings will be paired with a strip of fabric collage suggesting the beach.

I save ziplock bags full of bits and scraps of lace and fabric just for collage. The fabric collage strips are in progress, as shown in the photo of my worktable on the left. I love to work on cards because they’re small and quickly completed, allowing for lots of experimentation with techniques and mediums.

One last project to share, and this one is actually completed. It simply required several coats of varnish, and a label and hanging mechanism on the back, and it was done. Sunshine State doesn’t include shellwork but it is all about the beach. I had an incentive to finish this one — it’s headed to Florida to be in the silent auction at the Rotary Sanibel Arts and Crafts fair over President’s Day weekend.

I hope it reminds someone of exactly what they love about the beach.

 
Sunshine State.png
 

Sunshine State, mixed media collage on 12x12 wood artist’s panel

Gifts from the Sea

Do you find it hard to walk across a beach and not look for shells? I do. They are so alluring with their soft colors and curving shapes — little bits of sculpture that the sea just tosses nonchalantly up on the shore.

Souvenir shell box from the late 19th or early 20th century that (I believe) belonged to my great grandmother.

Souvenir shell box from the late 19th or early 20th century that (I believe) belonged to my great grandmother.

Since before our girls were born we have spent many if not most of our vacations on Sanibel Island, FL.  Sanibel is famous for its amazing shells. The way shells collect on the beaches has something to do with how the island is positioned— like a boomerang, off the south west coast of Florida. While I’m not totally clear on the oceanography behind it, the gulf waters spit up shells by the bucketful on Sanibel’s beaches and shelling is a very popular activity. I’m kind of obsessed; I sometimes have to forcefully remind myself to look at the beautiful water, the sky . . . but it’s so meditative to gather shells.  Each little gem I pick up, from the teeny, tiny perfect Murex to the random rectangular fragment with edges worn as smooth as glass — tells me something about what it could be.

The pieces in the photo collage above are examples of Victorian and early 20th century shellwork. It’s interesting to me that my great grandmother had one of these souvenir boxes — very similar to the ebay listings shown in the bottom left corner of…

The pieces in the photo collage above are examples of Victorian and early 20th century shellwork. It’s interesting to me that my great grandmother had one of these souvenir boxes — very similar to the ebay listings shown in the bottom left corner of the collage. Where did this wife of a small-time farmer in southern Indiana get one of these? I can’t imagine she ever took a sea-side vacation; maybe someone brought it to her.

Shells make intriguing frames for photos, prints and mirrors, particularly if the pictures are nautical-themed. The antique example here (bottom) features a print of a ship. I made a piece with a similar look (top) for a sea-themed mantel arrangemen…

Shells make intriguing frames for photos, prints and mirrors, particularly if the pictures are nautical-themed. The antique example here (bottom) features a print of a ship. I made a piece with a similar look (top) for a sea-themed mantel arrangement. I cut a picture from an old art book and adhered it to canvas board, then glued the shells directly on the print. I used a dark glaze to give the piece an aged look.

It seems we have always felt drawn to shells, given that shells have been used to decorate people, objects and spaces since ancient times. Increasing openness to scientific curiosity led to shell collecting becoming popular among the aristocracy in the 16th century; by the 17th and 18th century the swirling lines and curves of the popular Rococo style made shells one of the most common decorative motifs.  Everything from tables and chandeliers to the walls of elaborate grottos and follies got the shell treatment. The sailors manning ships on the trade routes of the early 19th century bought shell-encrusted boxes and pictures in the Caribbean and took them home as gifts to their sweethearts. These souvenirs, often heart-shaped or featuring heart-shaped designs, came to be known as Sailor’s Valentines. By the second half of the 19th century, better transportation created more opportunities for the average person to travel, and a very large market for souvenir sellers. In the late Victorian era shellwork boxes, frames and “valentines” were made in large numbers — both for the souvenir trade and by ladies who found that covering small boxes, bottles, and such with artistic arrangements of shells made a satisfying pastime.

If you’d like to see more examples of shell art, decorating and craft ideas, check out my Shellwork Pinterest board. For lots of information and inspiration, Shell Chic by Marlene Hurley Marshall is a gorgeous coffee-table book covering both history of the craft and how to’s for simple to complex projects.

Blog Post6c.png

There are artists today making traditional Sailor’s Valentines, which typically consists of a very precise, detailed design within a hinged wooden box. They are particularly popular in New England, where artists often use nautical-themed scrimshaw on ivory as the focal point of their design. Many of these artists exhibit and compete at the annual Sanibel Shell Show

Blog Post6d.png

So I’m in good company in my shell obsession. I think about this when I find I’ve spent an hour or more on the beach with my eyes cast down searching for an irresistible glimmer in the sand. But here in Raleigh, I need to get going on actually producing some of the many projects I dreamed up on the beach. I feel like I owe it to the shells.

I was so pleased to get my latest copy of Somerset Studio magazine and see that they included my submission for their “artwork incorporating stitching” theme in the Spring issue.

BlogPost 6b.png

The Shop is Open

shop launch.png

Finally. It has taken a very long time — ok years, of thinking about it and taking micro-baby steps (ie: setting up an account on Etsy for a shop but never actually opening it) to get it going. I could probably write a book on why that is, with multiple chapters devoted to procrastination techniques. Sometimes the idea looms so large that it keeps you from seeing what lies beyond it. In this case — filling in a few fields on Etsy’s start up page, uploading some pictures and entering some more data, and there you have it: a little shop on Etsy. Not so massive after all. And although there is a bit of a learning curve, it’s definitely a learn by doing kind of thing. If I’m actually taking and editing photos and implementing SEO techniques regularly, I’m sure my skills will improve more than if I’m just reading about other people doing it. So that’s enough looking in the rearview window, now I’m focused on moving forward and glad that the journey has finally begun.

1.jpg

Oh and the name . . . all that time I was thinking about a shop I never really settled on a name. I just figured I’d call it “RebeccaDeGroodtArt” or something similar. Not very imaginative but to the point. Some of the Etsy “gurus” are pretty adamant about a shop having its own clever little name, but I couldn’t think of anything. And I was wary of limiting what I could list in the shop based on the name. Yes I make art, but it tends toward smaller pieces, perfect for gifting but not so much for holding their own above the couch. I also make cards, Christmas ornaments, little books, upcycled small furnishings . . . This summer and fall as I started fine tuning the website and actively blogging I got a little more clarity on my own tendencies. I like to make all kinds of things and I’m often inspired by random things I find. I need a shop because I have a persistent muse and an avid inner magpie constantly egging each other on — so there’s a name. And it’s a name that’s not too specific about what’s in the shop, giving the muse and the magpie a little room for wandering.

Visit the new shop at themuseandthemagpie.etsy.com

2.jpg

A Very Custom Gallery Wall: The Laundry Room

Laundry Room shelves1.jpg

When we remodeled and enlarged our house two years ago we added a laundry room. Previously — in our circa 1970 house, the laundry had been in the garage. A lot of thought went into planning this space because it needed to have multiple functions. It’s for the laundry, but also acts as a butler’s pantry and extension of the adjacent studio space. I wanted a large table in the center, a stainless steel sink and lots of cabinetry. (I may have overcompensated slightly for having done laundry in the garage for a decade, but it’s now one of the most useful spaces in the house.)

I also had an aesthetic feel in mind for this space. I’ve always loved 1920’s and 30’s style, particularly the kitchens, but the look is very different from what’s going on in the rest of our house. So this space would be dedicated to that era’s style (if not appliances.) There are some very distinctive blues that appear in illustrations and decor from that time, a robin’s egg blue but also a darker shade — maybe you would call it a “Dutch” blue. I had the cabinet maker paint the cabinets in a custom blended color reminiscent of that darker blue. I left some of the shelves open to display glass jars, vintage ceramics and tins. I knew that I would frame and hang pages from a 1920’s Royal Baking Company recipe booklet that belonged to my grandmother in a gallery wall, but there are two large wall spaces that needed art.

Laundry Day by J.C. Spock

Laundry Day by J.C. Spock

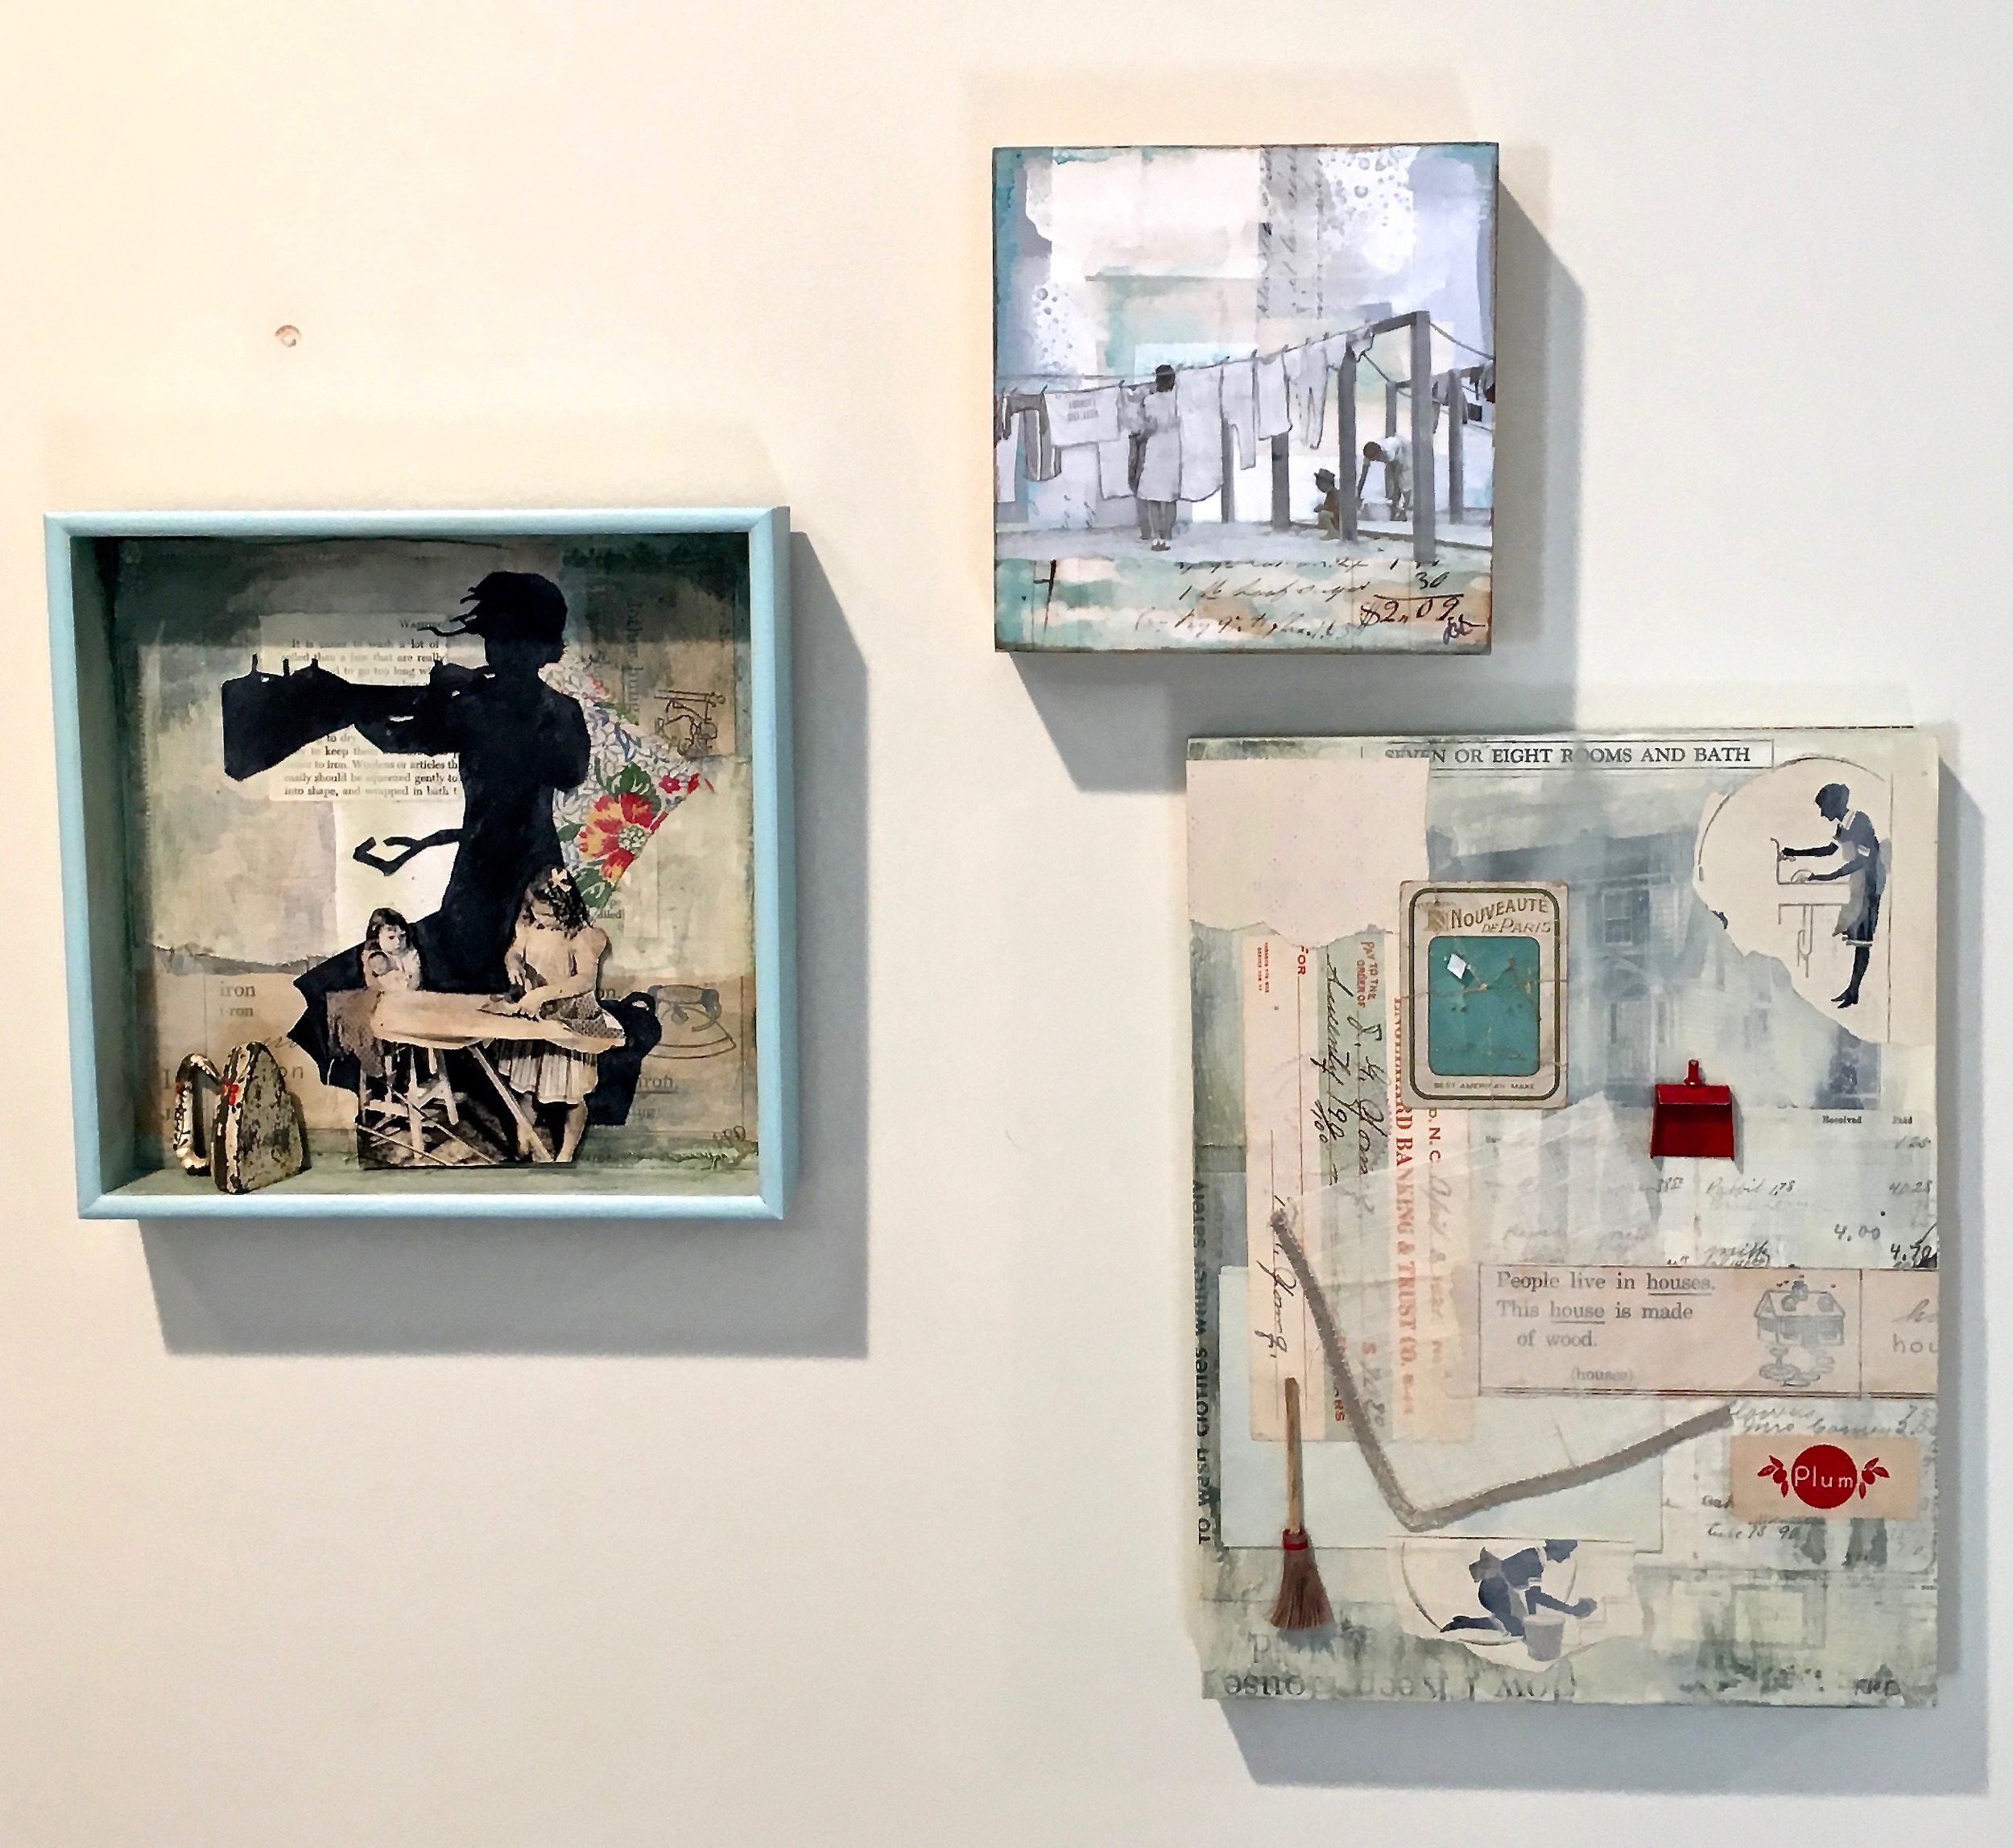
Scrolling through Instagram early last spring I saw that mixed media artist J.C. Spock had posted a new series of collages called Life in the 30’s. Her work features a washed out mostly monochromatic palette often with swatches of faded sky blues. I immediately fell in love a collage featuring a black and white photograph of women hanging out laundry. What could be more perfect for my laundry room? But a 6x6 panel could not carry an entire wall, so I had the pleasure of creating a small collection of pieces to complete the grouping.

Elements for Housekeeping2: The Oak Park

Elements for Housekeeping2: The Oak Park

I have a Dover reproduction of a Sears Roebuck House catalog and had wanted to create a collage based around one of the illustrations for a long time, the housekeeping theme I was working with provided the perfect opportunity. Silhouettes of a maid from an advertisement in an old Ladies Home Journal magazine, a dollhouse broom and dustpan set, a bit of a hand-stitched linen napkin, a button card with just one precious mother of pear diamond button remaining and other small pieces of ephemera completed the piece. The elements are blended into a cohesive whole with washes of milk and mineral paints that with their mat and somewhat granular consistency suggest old plaster.

Next up, a tiny toy iron I picked up on an antiquing excursion. In kind of rough shape, it seems to have been well loved and pairs nicely with a black and white photo of little girls ironing doll clothes. Another silhouette ties this piece to the first collage and looms like a shadow of the mother the girls are imitating and a roll they will most likely fill in adulthood. I used a small wood tray picked up at a local thrift shop as the substrate for this shadowbox.

Laundry Day by J.C. Spock, Housekeeping 1:The Oak Park, collage on basswood panel and Housekeeping 2: Ironing, shadowbox assemblage

Laundry Day by J.C. Spock, Housekeeping 1:The Oak Park, collage on basswood panel and Housekeeping 2: Ironing, shadowbox assemblage

Elements for A Chicken Story

Elements for A Chicken Story

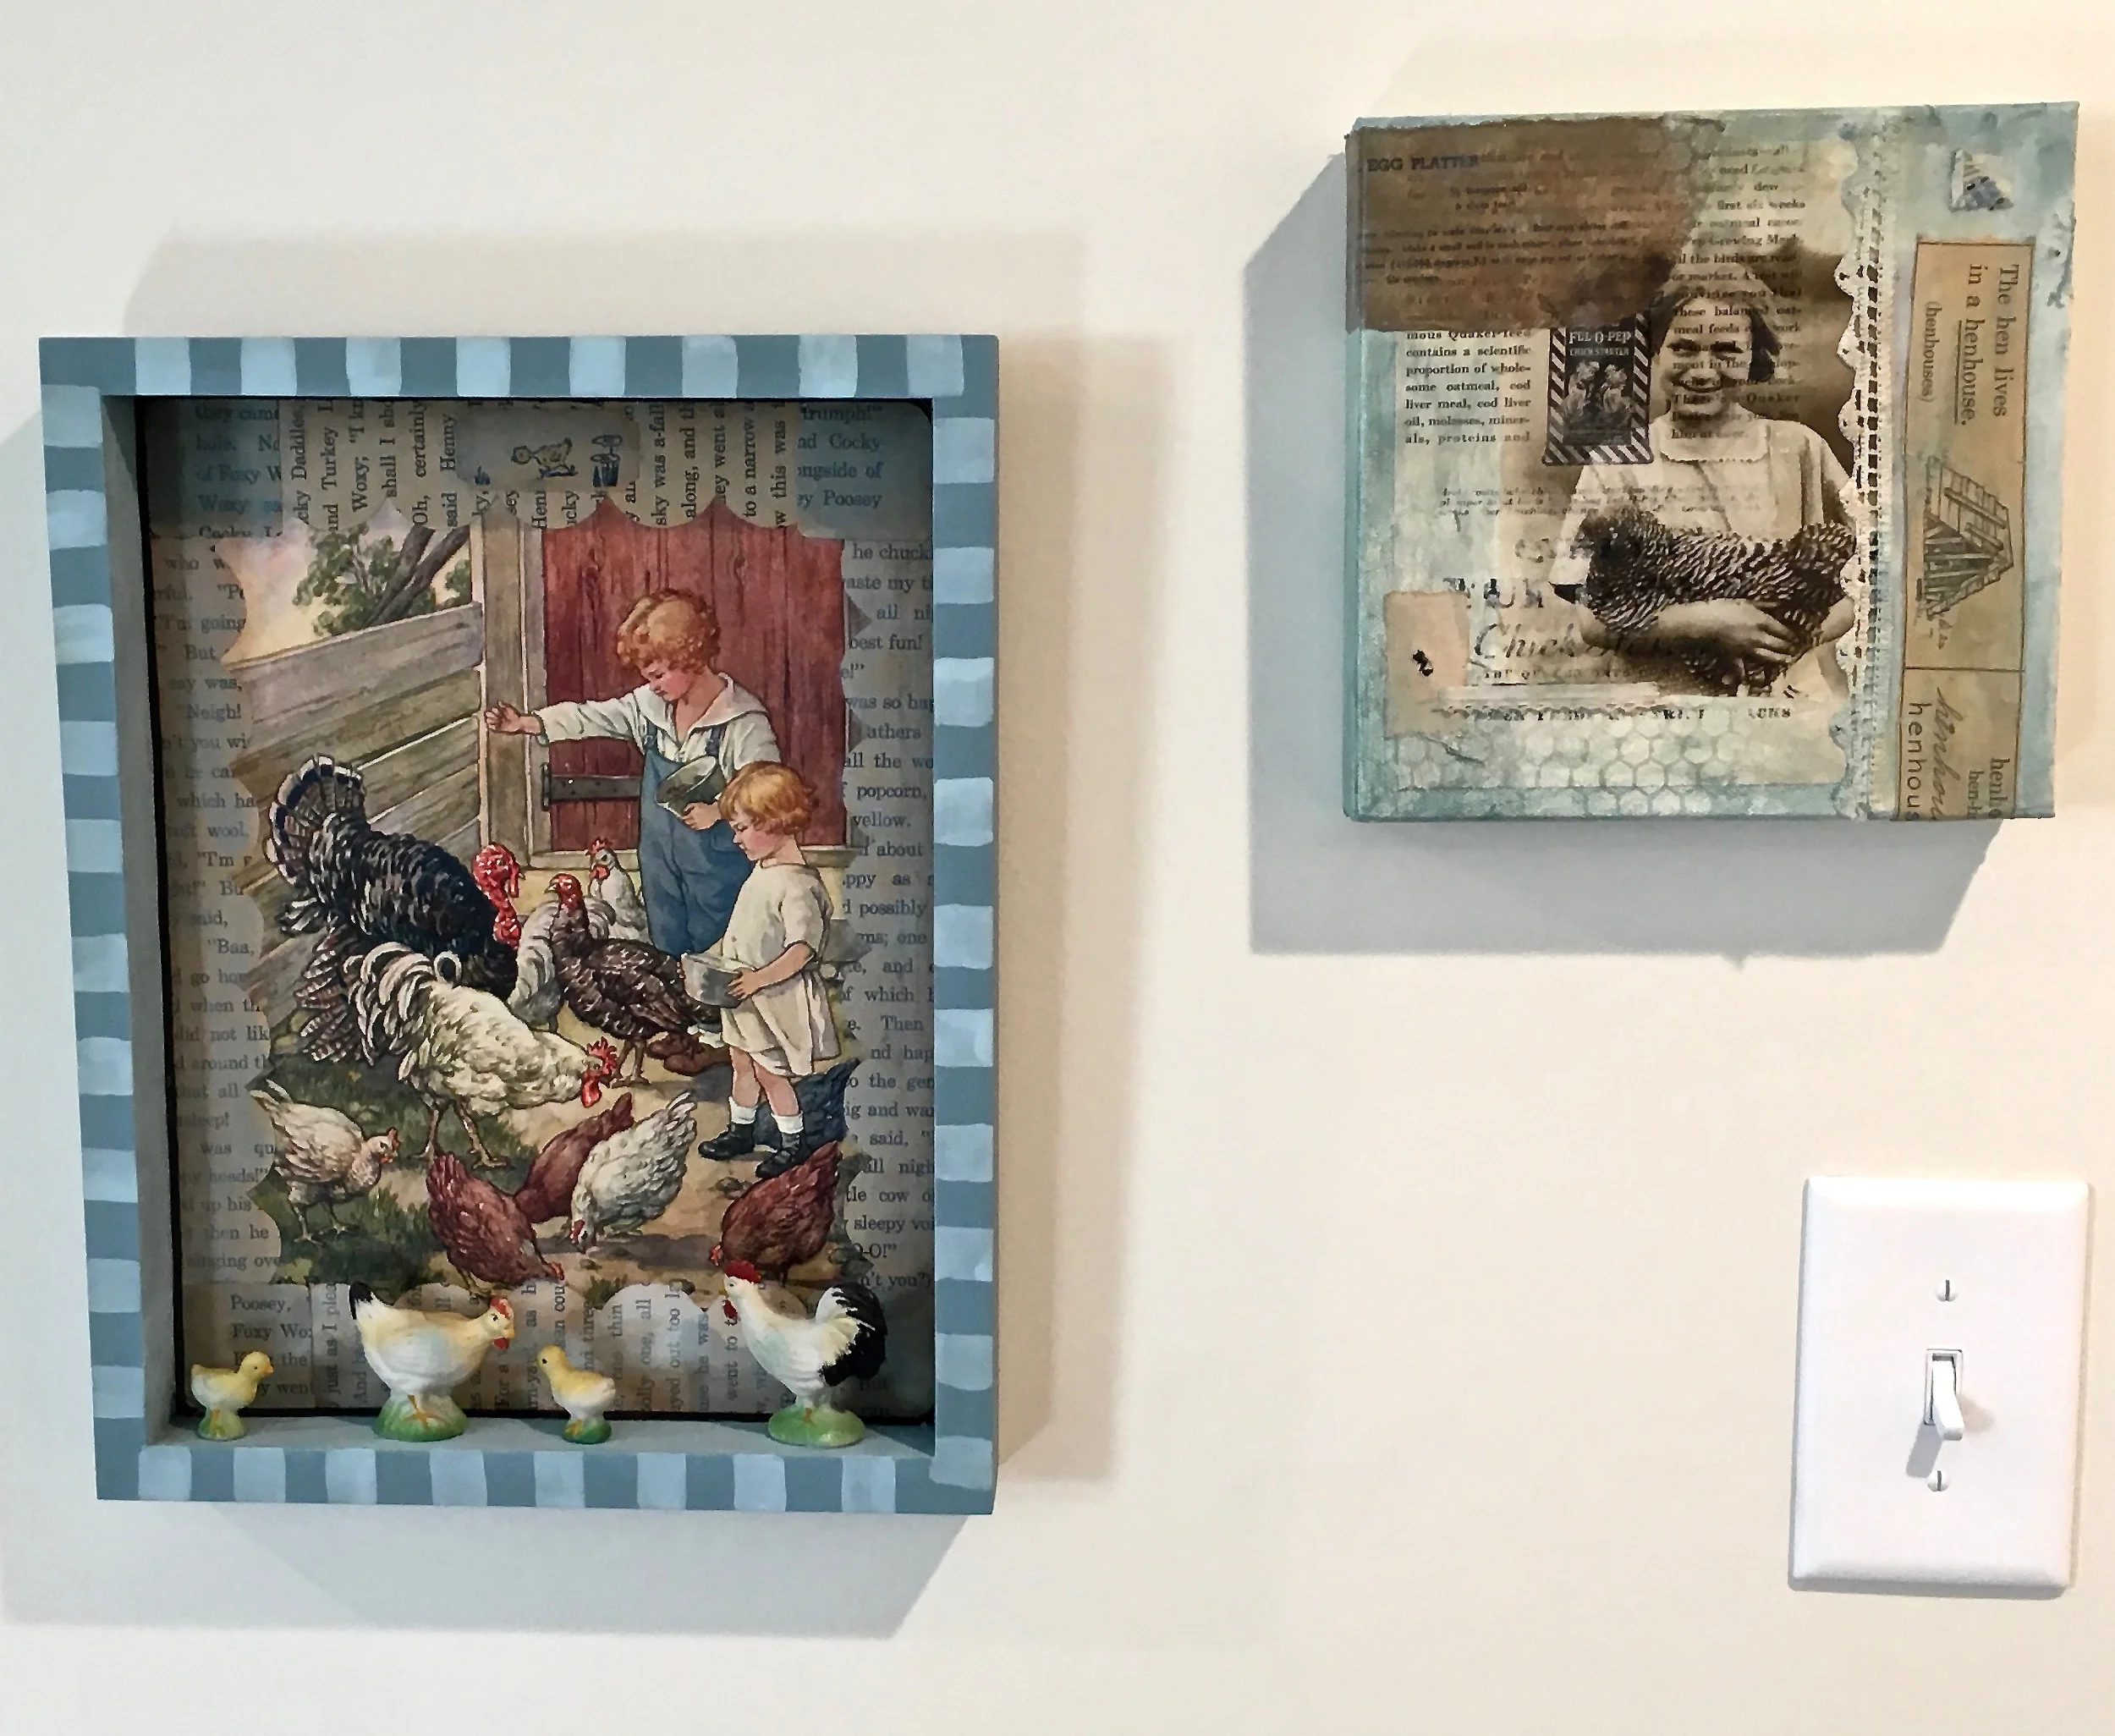
These two pieces with the JC Spock collage made a complete but small grouping that really only filled one side of the wall. Time for some chicken art! I had an old children’s book illustration that I’d been saving for just the right piece. The colors leant themselves to a painted blue frame; and since keeping chickens was common in early 20th century households, the subject complimented my period “homemaking” theme. I paired the illustration with a happy chicken family (from my stash of vintage figurines) on the inside of a basswood artist panel. As a companion to this shadowbox-type assemblage, I created a collage inspired by JC Spock. I made a semi-transparent transfer of an old photograph as the central image, and added bits of period textiles and text and illustrations from a children’s dictionary and old agricultural magazines. This piece is on a stretched canvas panel.

A Chicken Story, shadowbox assemblage and Girl with Chicken, collage on canvas

A Chicken Story, shadowbox assemblage and Girl with Chicken, collage on canvas

In the center of the this wall is a built-in, fold-down ironing board. which was also a common feature in early 20th century homes in the kitchen. It makes the board easily accessible but out of the way — very convenient.

In the center of the this wall is a built-in, fold-down ironing board. which was also a common feature in early 20th century homes in the kitchen. It makes the board easily accessible but out of the way — very convenient.

And that completes one wall. I was going to include the second gallery wall in this post — the one inspired by my grandmother’s 1920’s promotional recipe booklet, but this post has already gotten kind of long. So I’ll save that for another time. The takeaway?

One personally significant piece can be the jumping off point for an entire room full of art.

And it doesn’t have to be “art” — it could be a framed book page, a shadowbox created from a favorite object, or a photograph. Let the subject matter, colors or time period guide you toward a theme. Once you have your theme, type it into Google, Etsy, or Pinterest for items to buy or ideas for pieces to hunt for or create yourself.

(In future posts I’ll go step by step through some simple projects for doing it yourself.)

Our girls, the feathered ones anyway

Our girls, the feathered ones anyway

Seasonal Still Lives: Simple Tweaks Mark the Changes of the Year

Small wall shelf in guest bathroom, mid-September through end of November

Small wall shelf in guest bathroom, mid-September through end of November

 I change up the items decorating many of the shelves and tabletops in my home every couple of months, on average. Each changing season offers a different theme, a new color palette, an opportunity to shuffle things around and create an artful arrangement. It is time consuming — not only do new things go up but things come down and have to be put away. But I enjoy creating vignettes; it’s another form of visual composition, just in 3-D not on a canvas. I also love to treasure hunt, I never pass an antiques shop or  flea market and not wish I could stop. Mixing up my decorative vignettes seasonally gives me a way to keep the treasures in rotation (and an excuse to keep hunting them down.)

I used to think I must be some kind of crazy to do this, but then Pinterest came along and I realized I’m definitely not alone.

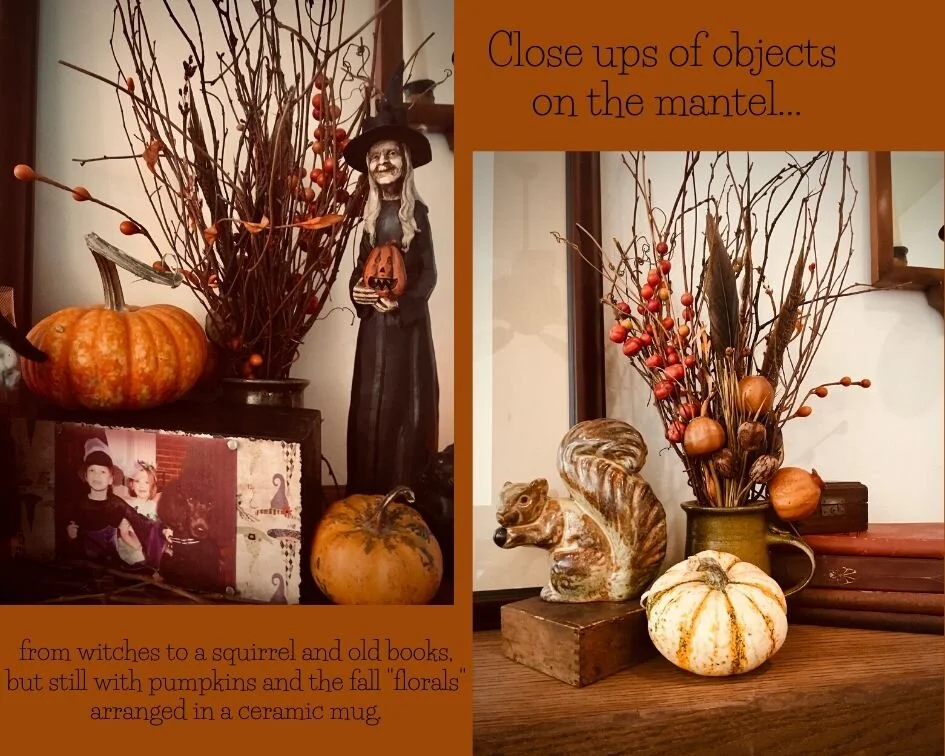
Fall, in particular, offers an abundance of decorating options.  I love Halloween — not the gory, horror-type but more the folksy, traditional, makes you think of a Grandma Moses painting-type. I’ve been collecting Halloween decorations since we were first married. But I’m a little late to be posting about Halloween, today I transitioned the decor to a more general fall theme for November.  We went from witches to acorns and squirrels.

This may sound a little over the top, after all Christmas is right around the corner. But I’ve got some tricks for a quick change up and it didn’t take too long; it still felt like a pleasure not a chore. For Christmas I will start with a blank slate, but to make the distinction between Halloween and Thanksgiving I just did a little adding and subtracting and shuffled some things around. There are other times during the year when I do this, but adding a little Easter into Spring, or 4th of July into Summer takes even less time. We just happen to have a lot of Halloween stuff and my girls, even though they’re teenagers, really love to see it up every year.

Here is my number one tip for making frequent vignette changes easy:

  • Keep the same arrangement, just switch the objects in it.

Blogpost3C5.jpg

This vignette on the hall table includes two decoupaged plates and a decoupaged faux pumpkin. The plates switch from a rat and jack-o-lantern to an autumn scene and turkey. The pumpkin stays.

Blogpost3C3b.jpg
Blogpost3C4 (1).jpg
blogpost3c1 (1).jpg

I salvaged the cabinet doors when we remodeled our kitchen and have painted several with seasonal themes to place on the shelf above the range. I wasn’t so happy with the landscape on the Thanksgiving one, but the lettering came out as I’d imagined. I’m going to be making a folding screen for our living room from the old pantry doors using a similar style of painting a landscape within the panels. We’ll see how that goes . . .

A few more tips:

  • Just switching from votives to candlesticks or pillars can change the mood of an arrangement.

  • Have core elements that always stay the same and just arrange smaller items around them — for example, the framed picture on our family room mantel.

  • Objects from nature are one of the simplest ways to suggest a new season and the easiest to switch out. The bare branches in the mug on the mantel could have been asters in September; you could get from September through February with a bowl filled with apples, then mini pumpkins and then small pinecones.

Dining room table centerpiece, mid-September through end of November

Dining room table centerpiece, mid-September through end of November

I’ll be sharing photos of my vignettes as they change over the course of the year. I hope you’ll enjoy the pictures and who knows, there may be an idea or two you want to borrow to celebrate the changing seasons in your own home.