Create a Very Special Gift or Personal Art Piece with a Shadow Box

Do you have a small object, a handful of shells, a very special photo that calls to mind a person, a happy memory, a certain time? A shadowbox is a great way to showcase a small memento or photo that might otherwise get stuck away out of sight and out of mind. Sometimes they’re called memory boxes, or personal shrines — whatever we call it, it’s simply a small box featuring a vignette of objects that are significant to your own, or a gift recipient’s, personal story.
As a mixed media artist I have made some fairly elaborate shadowbox-type assemblages. But the concept is simple — you don’t have to call yourself an “artist” to make one (but you can). Gather your small treasure or treasures and a few complementary elements and adhere them to the inside of an appropriately deep box. Here are some ideas for objects you could use: a photo, a postcard or small piece of art, kitchen items like cookie cutters or vintage tools, garden or other small hand tools, sewing implements, old letters, small figurines, shells, acorns . . . the possibilities are only limited by the size of your box.
Beach Access no 5

Examples of possible boxes for creating a shadow box: a small “orphaned” drawer, a very old wood —drawer divider? (not sure about its original purpose), the lid to a cardboard gift box, Apple boxes, half of a wood cigar box.
For the box, anything that is deep enough to hold your object and sturdy enough to stand freely or be hung, will work. If you use a cardboard box, make sure it is a thick pressed (not corrugated) board. Apple’s boxes (iphones, ipads, etc.) work great. If the box is wood, you’ll most likely be able to leave it as is — maybe bring out the finish of old wood with a furniture wax or oil. But you will probably want to cover a cardboard box with paper or paint. Papering is a little more complicated in that you’ll need to measure and cut the paper to fit around the box — try one long piece to cover each end and a wide piece to reach around the sides. You’ll end up with two layers of paper across the back, but that will just help strengthen the box. The 12x12” decorative papers sold in craft stores are a good option, as is a heavyweight wrapping paper. If you’re going to paint the box, use a quality acrylic paint (like a soft body acrylic artist’s paint) that will cover any logos thoroughly in just one or two coats. Too many coats of paint will cause the cardboard to warp or separate into layers.

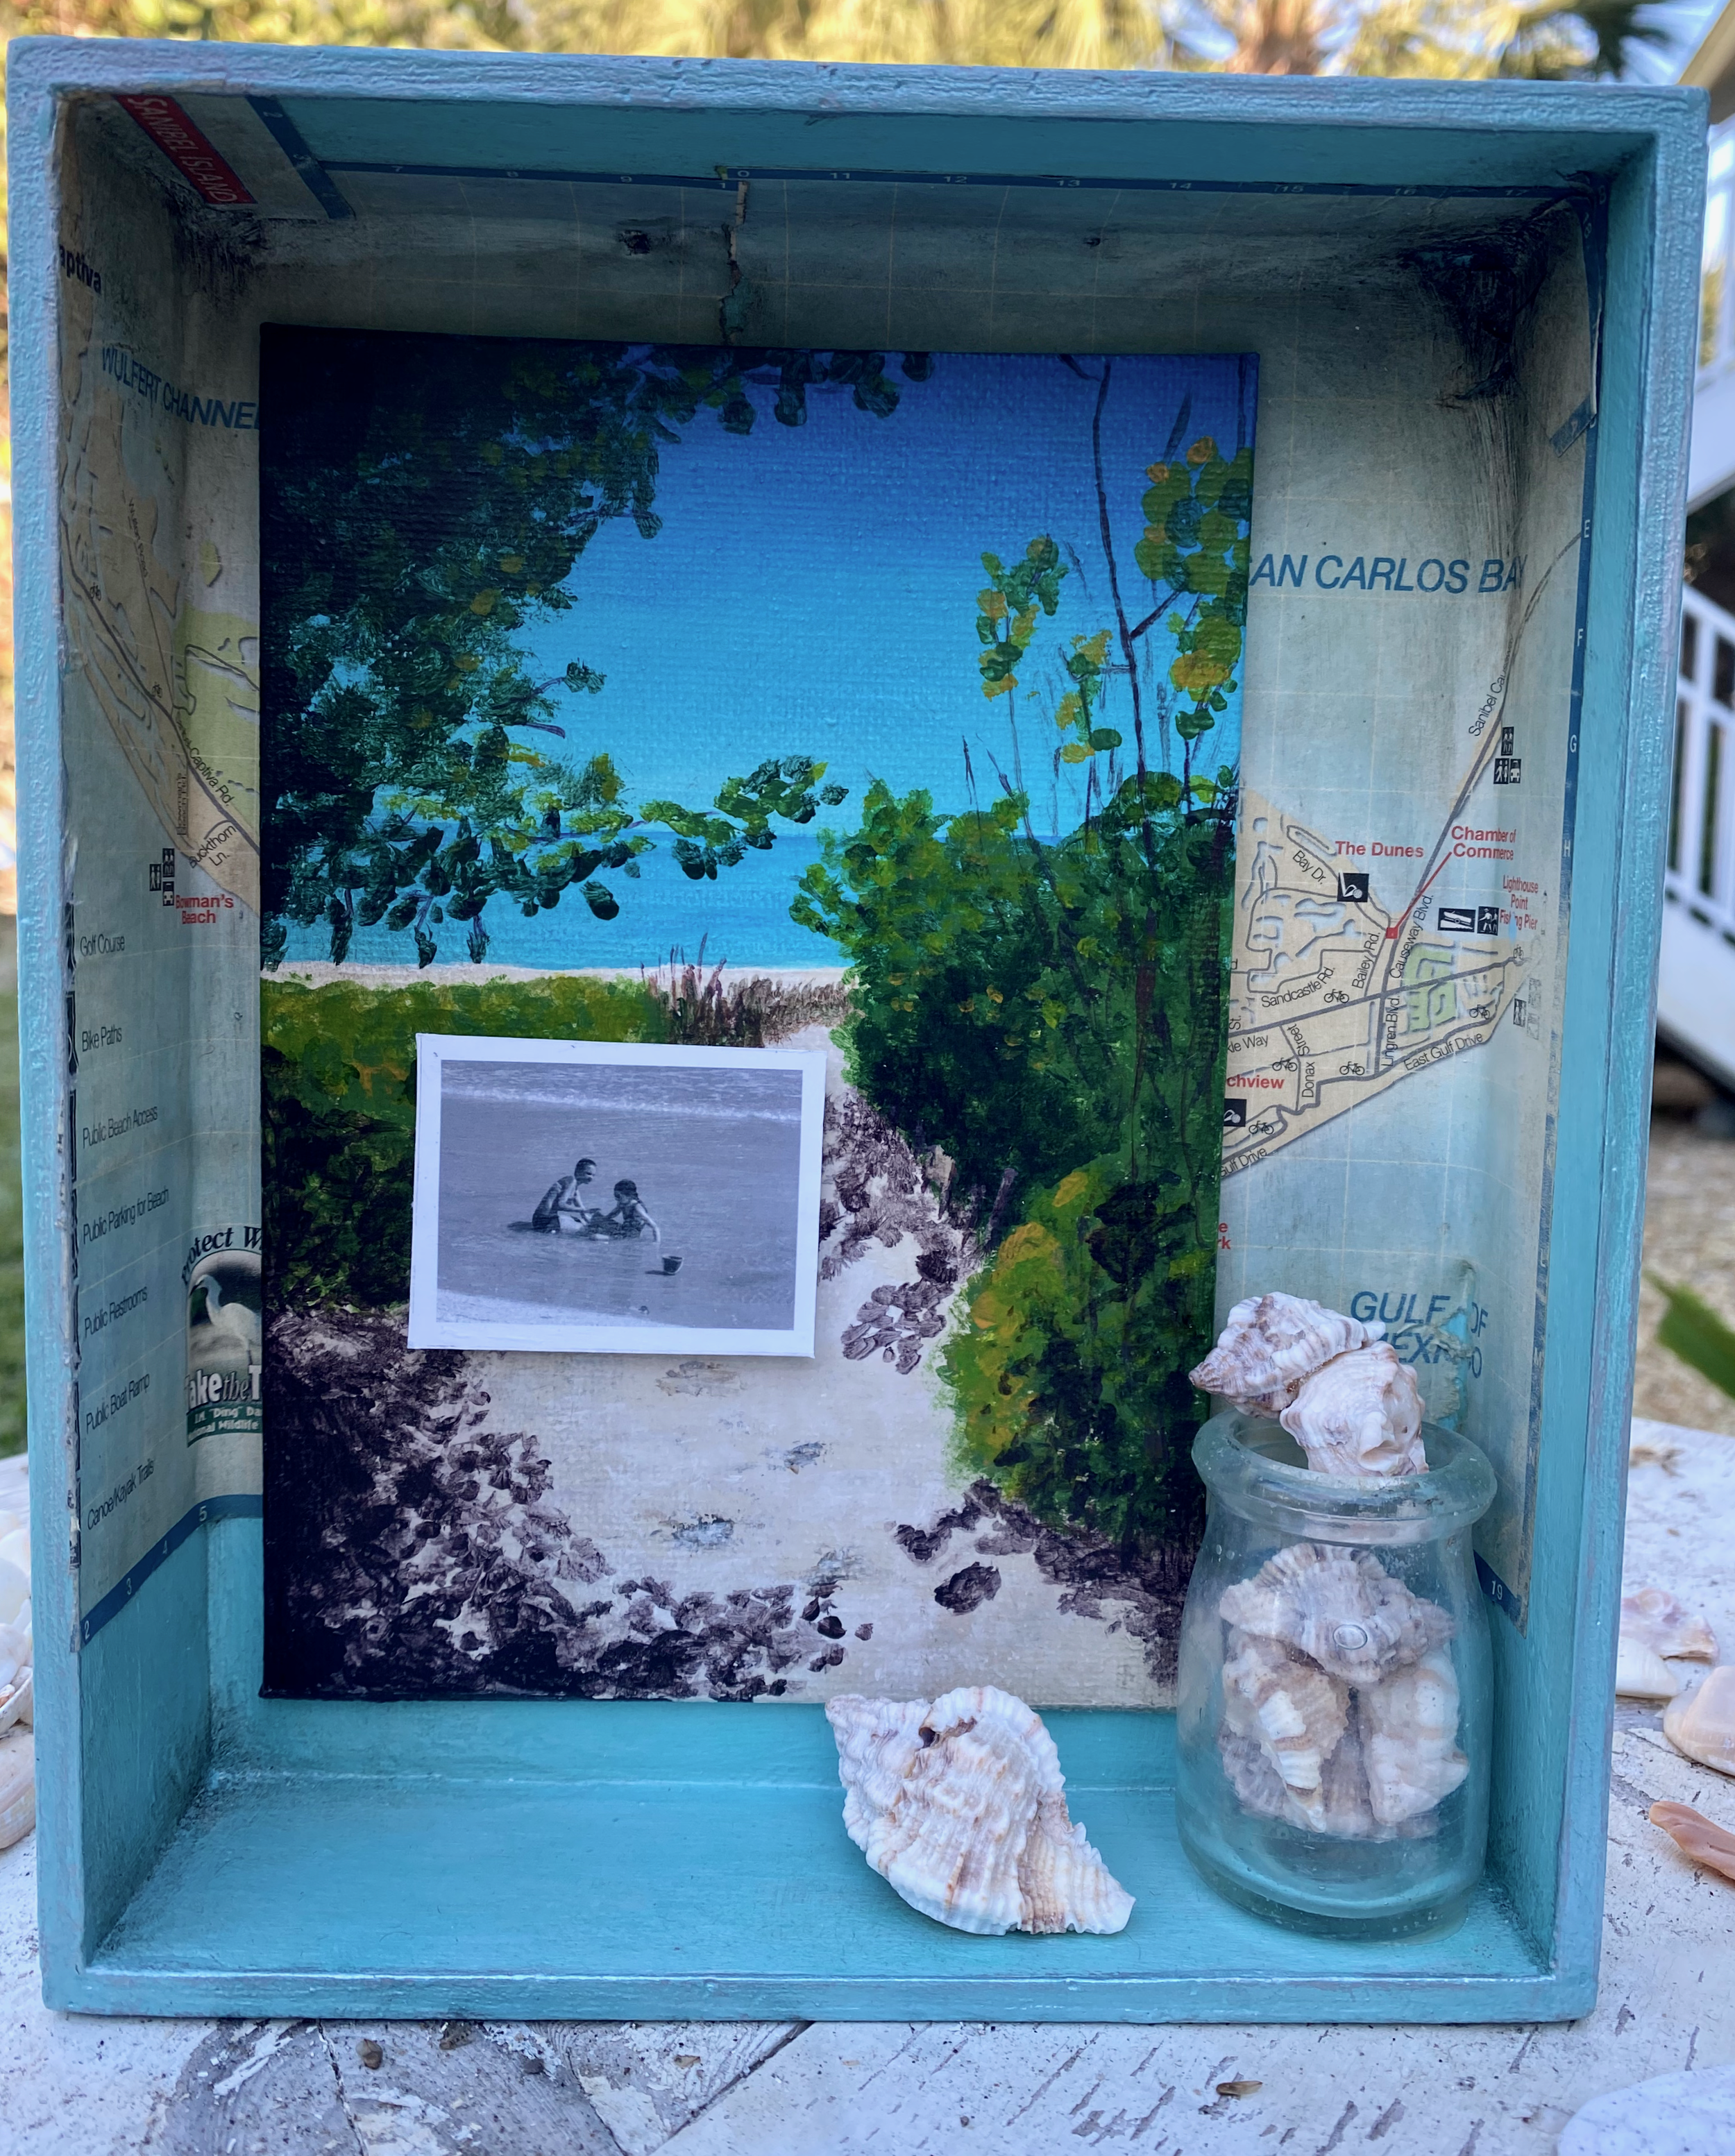
Next you’ll create a little scene — a vignette, within the box featuring your item or items. To embellish the scene you may want to add additional elements — for example, shells in a box featuring a beach photo. These elements will enhance your featured item — flesh out the story, so to speak.
The box pictured above was a gift for an avid bicycler. The 1930’s tin bicyclist figure is the focus item. Silhouettes representing landscape, and cut from a map, set the scene and speak to the cross country bike trips taken by the gift recipient. The picture below breaks down the components of the box and offers tips on how it was assembled.


The box on the right features a small figurine of St. Francis picked up as a souvenir in Assisi, Italy. These kinds of little tchotchkes are ubiquitous in popular travel spots and sometimes irresistible to pick up along the way. But what to do with them once you’re home? The St. Francis figurine is too small to stand alone on a shelf or bedside table. But he holds too many happy memories from a very significant trip to end up in a junk drawer, or worse — the trash. Here, he’s given his own little iPhone-box shrine. The addition of a “pedestal” base (a wood round available at craft stores) and clay tiles framing the edges give the piece enough substance to comfortably hold its own among other objects on a shelf or small table. A simplified version might include lining a small box with maps, brochures and/or postcards from the site, or of course, personal photos.
A note on using postcards and printed photos: They’re easier to work with if you copy them on to printer paper, but use a laser-type printer or copier — ink jet copies may run when exposed to wet glue. If you feel like the object needs more height in the box, raise it up by gluing it to a wood block or other item — like an overturned shell or even a small rock (use a very strong glue like E6000 and prop your object in place while it dries.)
The kitchen is the heart of the home and many of us have old family recipes, cookie cutters or other small kitchen tools that belonged to a relative and are meaningful to us, but we don’t use. Placing such items in a shadowbox makes it possible to enjoy them on a daily basis while also protecting them from deterioration. Below is a breakdown of the components and techniques used for just such a project. The delicate hand-written recipe and slightly rusted tin cookie cutter belonged to my great grandmother. (Consider color copying an old recipe to use in your display if you are concerned about preserving the original.)
Note: This project uses purchased shadow box frames — always an option and readily available at craft and even some home decor stores such as Pottery Barn.

And then there are holiday decorations — Christmas tree ornaments are particularly well suited to shadow box display because they’re small. A fragile ornament that belonged to grandmother may hold a special place in your heart, but not quite work on your current tree. Ensconced in its own shadow box, a precious memento can have a place of honor in your holiday decorating scheme. Find (or purchase) an appropriate box and complete the vignette with a holiday card and/or wrapping paper in complementary themes and colors.

Winking Elf Christmas Whimsy Box
A note on hanging your shadow box: Attach a sawtooth hanger with hot glue or tiny nails to the back of a wood box. Some sawtooth hangers come with pointed tips that can be carefully hammered into the wood surface. Cardboard is trickier because a glued on hanger may eventually pull away from paper or the top layer of the cardboard if the box has much weight in it. To create a sturdy hanging loop, use an awl to poke small holes inside the upper corners of the box. Knot a length of twine, ribbon or picture wire at one end and thread it through one hole inside the box. Thread it back through the opposite hole, knot it and cut off the excess. If the visible knots bother you, hide them behind a decorative element.


Finally, make sure you note on the back of the box the significance of the objects within. You can use a permanent ink pen to write directly on the surface, or create a label and glue it in place. Include the date the box was created and, if it’s a gift, the occasion. Record the item’s provenance if it has history — for example, “Grandma Busse’s recipe for Gingerbread”, or, “a souvenir from our anniversary trip to Italy”.
And now, basque in the glow of your creative conservation of cherished memories.
Happy Making!